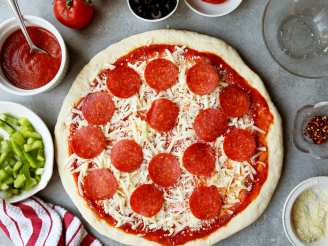
Thin Pizza Crust - Pizzeria Bianco, Phoenix

"The dough is wetter and stickier than most pizza doughs -- but it bakes up light and crisp. Be sure to add in the additional 1/2 cup flour after stirring in the water. Continue to sprinkle with flour as you knead the dough. Published in Gourmet, January 2006. A good platform for lighter pizza toppings. Update: Several members have commented that they have had issues with their yeast. I have made this recipe many times with no trouble. When the yeast "foams", all you need is a thin layer coating the top of the liquid. Also, be sure to use unbleached flour, not the standard bleached flour. Hope that helps."

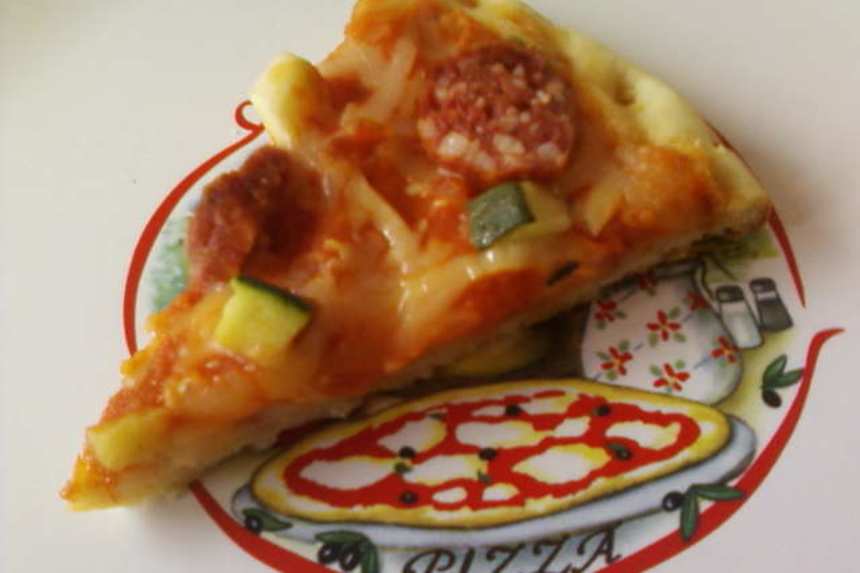
photo by littlemafia


- Ready In:
- 1hr 25mins
- Ingredients:
- 6
- Serves:
-
6-8
ingredients
- 1 (1/4 ounce) package active dry yeast (2 1/4 teaspoons)
- 2 cups unbleached all-purpose flour (not regular bleached all-purpose flour)
- 3⁄4 cup warm water (105 - 115 F)
- 1 1⁄2 teaspoons salt
- 1 1⁄2 teaspoons extra virgin olive oil
- 1 -2 tablespoon cornmeal
directions
- Place pizza stone on lowest rack and preheat oven to 500F (allow 1 hour for pizza stone to heat).
- Stir together yeast, 1 T flour, and 1/4 cup warm water in a measuring cup and let stand until mixture develops a cream foam on surface, about 5 minutes. (If mixture doesn't foam, discard and start over with new yeast.).
- Stir together 1 1/4 cups flour with salt in a large bowl. Add yeast mixture, olive oil, and remaining 1/2 cup warm water and stir until smooth. Stir in enough flour (about 1/2 cup) to make dough come away from sides of bowl. (Dough will be wetter than other pizza doughs you may have made.).
- Knead dough on lightly floured surface with lightly floured hands (reflour hands when dough becomes too sticky) until smooth, soft, and elastic, about 8 minutes. Form dough into a ball, put on a lightly floured surface, and generously dust with flour. Loosely cover with plastic wrap and let rise in a warm draft-free place until doubled in bulk, about 1 1/4 hours. Dust a wooden peel or a lage baking sheet (without sides) with cornmeal.
- Do not punch down dough. Carefully dredge dough in a bowl of flour to coat and transfer to a dry work surface. Holding one edge of dough in the air with both hands and letting bottom just touch the work surface, carefully and quickly move hands around edge of dough (like turning a steering wheel), allowing weight of dought to stretch round to roughly 10 inches. Lay dough flat on peel or baking sheet.
- Continue to work edge of dough with your fingers, stretching it into a 14-inch round.
- Brush dough with olive oil (about 1 T), leaving a 1-inch border. Scatter toppings over dough.
- Line up far edge of peel with far edge of stone in sove and tilt peel, jerking it gently to start pizza moving. When edge of pizza touches stone, quickly pull back peel to transfer pizza to stone (do not pull back pizza).
- Bake until crust is golden and cheese is bubbling, 10-12 minutes. Slide peel under pizza to remove from oven.
Questions & Replies

Got a question?
Share it with the community!
Reviews
-
 Our pizza was probably a 3-star result, but the problems were largely my fault, so I'm going to give the recipe 4 stars. I used a baking sheet rather than a pizza stone, and I think that was a mistake. I also discovered that my seldom-used cornmeal had bugs in it (yuck!), so I attempted to use flour instead. That didn't work so well. I do have a concern about the method used to start the yeast. I went through three brand new packets of yeast trying to get the mixture to foam. The third time I threw in a few pinches of sugar, and only then did I get foam. I suggest adding a bit of sugar from the start. Thanks for posting!
 -
 I made two batches of this recipe, the first one my water was too hot so dough did not rise as well. Second batch was perfect and doubled in size nicely. Both batches stretched and cooked well. I should say exceptionally well since there were parts of the crust that were so thin I was worried the toppings would leak through, but it does indeed fluff up nicely. For others I would suggest check the temperature of your water and yeast should be at room temperature, so if stored in refrigerator (like I do), take it out and let it warm up before using. Excellent and saved to my recipe book, thanks for posting!
 -
 We have a rule :mom makes the dough and I make the topping. And it works great every time,especially since I don't like to touch dough. My mom said it was wetter than her usual recipe and she adds more oil to it. We enjoyed it.Thanks for sharing.
 -
 This is good. I had difficulty with Step 2-the first time it did not foam up, so tried again and it did bubble slightly. Both yeast packages expiration dates were March 2010. I had no more yeast here, so went with it. The technique in Step 2 is unique in that it uses flour vs. a bit of sugar. I see that this recipe is posted in other sites, most of which have the flour mixed in with yeast but when I make this again I will use a teaspoon of sugar instead. Thank you swissms for sharing.
Tweaks
-
This is good. I had difficulty with Step 2-the first time it did not foam up, so tried again and it did bubble slightly. Both yeast packages expiration dates were March 2010. I had no more yeast here, so went with it. The technique in Step 2 is unique in that it uses flour vs. a bit of sugar. I see that this recipe is posted in other sites, most of which have the flour mixed in with yeast but when I make this again I will use a teaspoon of sugar instead. Thank you swissms for sharing.
RECIPE SUBMITTED BY

I love cooking for family and friends. I especially enjoy baking...it is like combining art and science to create something extraordinary.
I am most known for making desserts like Recipe #336060. My pet peeve: when people sign-up to bring dessert to a pot-luck or dinner party and they bring something pre-made from the store. My friends and family now know to always let me bring the dessert. :)
I enjoy traveling and believe that one of the best ways to experience a culture is through food. I have lived in Germany, Spain and Switzerland, and currently live in the US.
My rating system:
5 stars - Excellent! Delicious! Could not be better...will make often.
4 stars - Very good! May tweak slightly.
3 stars - Good base recipe. Will need to tweak.
2 stars - Ok. Will keep looking.
Cooking Contests & Games:
<img src=http://www.recipezaar.com/members/home/590105/hcabc.jpg>
<img src="http://img.photobucket.com/albums/v726/annacia/Permanent%20Banners/snow-queens-sm.jpg" border="0" alt="Photobucket"></a>
<img src="http://i270.photobucket.com/albums/jj81/HokiesLady65/Banners/ST_AMBADGE.jpg">
<img src="http://i10.photobucket.com/albums/a132/tgifford/Game%20Room%20Banners/AM%20Banners/holidaybadge.gif" border="0" alt="Photobucket">
<img src="http://i147.photobucket.com/albums/r317/j_welcome/pics2/food/PRMRcopy.jpg">
<img src="http://i80.photobucket.com/albums/j166/ZaarNicksMom/Animation6.gif"> <img src="http://i80.photobucket.com/albums/j166/ZaarNicksMom/PACsticker-Adopted.jpg">
<img src="http://img.photobucket.com/albums/v726/annacia/Permanent%20Banners/cc-banner-7-09.jpg" border="0" alt="Photobucket"></a>
<img src="http://i250.photobucket.com/albums/gg271/MrsTeny/Permanent%20Collection/PACSpring09Participation.jpg"> <img src="http://i250.photobucket.com/albums/gg271/MrsTeny/Permanent%20Collection/PACSpring09Iwasadopted.jpg">